Blackjack Strategy Articles & Guides
Plain-English guides to playing blackjack well: basic strategy, card counting, casino rules, and the math behind the game. Educational only, no real money, ever.
Basic strategy
Blackjack Basic Strategy, Explained in Plain English
What the chart really is, why it works, and the five decisions that teach the logic behind every cell.

How to Read a Basic Strategy Chart
Rows, columns, the letters, the order to check your options in, and why two correct charts can disagree.
When to Hit and When to Stand
Stand your stiffs against a weak dealer, hit them against a strong one, and know the two famous exceptions.
When to Double Down in Blackjack
The 11s, 10s and 9s, the soft doubles everyone skips, and why missing correct doubles is the expensive habit.
Splitting Pairs: Always, Never, and It Depends
Always aces and 8s, never 10s and 5s, and the dealer decides the rest. Plus how DAS moves the borderline pairs.

A Blackjack Cheat Sheet That Fits in Your Head
Ten rules of thumb that cover most hands, what each shortcut costs, and when to graduate to the full chart.

Soft Hands: Why Ace-Six Is Not a 17
The flexible ace rewrites the rules: always draw on soft 17 or less, the soft doubling ladder, and the soft 18 trap.
Surrender: The Most Misunderstood Move
The rule most players either ignore or overuse. Exactly which hands to surrender under S17 and H17, why a pair of 8s is the exception, and what the option is worth.
Why Basic Strategy Says Never Take Insurance
The arithmetic behind the refusal, why even money is the same bet in a costume, and the single count-based exception.
16 Against a 10: The Worst Hand, Played Right
The most hated hand in blackjack. Why basic strategy surrenders or hits it, when your own cards change the answer, and where the count flips it.
Reading the Dealer Upcard
One visible card drives every decision you make. Dealer bust rates by upcard, and why the chart has a visible seam between the 6 and the 7.
Composition-Dependent Strategy: Beyond the Chart
The chart cares about your total. Composition-dependent strategy cares which cards made it. How much that is actually worth, by deck count.

What Common Blackjack Mistakes Actually Cost
Insurance, 6:5 tables, standing on 16 out of fear: what each common blackjack mistake actually costs in cents per dollar wagered.
12 Against a 2 and a 3: The Closest Calls on the Chart
The chart says hit, most players stand, and both plays lose. Why the boundary sits between a dealer 3 and a 4, and what changes the answer.
Soft 18: The Hand Most Players Misplay
Ace-7 looks like a finished hand and is not. Why basic strategy hits it against a 9, 10 or ace, and doubles it against weak upcards.
When to Split 9s (and When Not To)
Split against 2-6 and 8-9, stand against 7, 10 and ace. Why the gap at dealer 7 is the chart's best riddle.
Why You Always Split Aces and 8s
Two splits hold against every dealer upcard. The reasons behind them are completely different.

Never Split 10s: The Move That Feels Smart
Two shots at 20 feels smart. The math says a made 20 is worth more standing, and splitting doubles what you risk to get less.
Hard 11: The Best Doubling Hand in Blackjack
No card busts it and the densest value completes it to 21. Why 11 doubles against nearly everything, and the two rules that interfere.
The Handful of Hands That Change With the Rules
Most of basic strategy never moves. Here are the few cells that do, and which rule lever moves each one.
Hard 16 Against a 9: The Other Difficult Stiff
Surrender if the table allows it, otherwise hit. Why 16 against a 9 is not the coin flip it feels like, and how far the count must rise before standing.
Splitting 7s: The Pair That Follows the Dealer
A pair of 7s splits against dealer 2 through 7 and hits against 8 and higher. The rule tracks the dealer's weakness, not your total.
Splitting 2s and 3s Against Weak Upcards
Split 2s and 3s against 2 through 7 with DAS, 4 through 7 without it, and why the rule matters.
Splitting 4s and 6s: The Pairs That Depend on DAS
Split 4s only against a 5 or 6 with double after split, and 6s against weak upcards. Why DAS moves both rows, plus the mistakes to avoid.

Doubling for Less: Why the Discount Costs You
Doubling for less keeps the one card restriction but shrinks the money. When the chart says double, a partial double earns less, and a small one can lose to hitting.
Doubling Hard 9: Why the Dealer 3 Through 6 Window Matters
In multi-deck games basic strategy doubles hard 9 against a dealer 3 through 6 and hits everything else. Here is why that window is so narrow.

Doubling Hard 10: The Two Upcards That Stop It
In multi-deck games hard 10 doubles against every dealer upcard from 2 through 9 and stops at two places: the 10 and the ace. Here is why.

Hard 15 Against a 10: Surrender, Hit, or Index
Surrender where late surrender is offered, hit otherwise, and stand only at a true count of +4. The dealer and bust math behind each answer.
Playing Against a Dealer 2, Hand by Hand
The 2 busts least often of the low upcards, which is why 12 hits, 9 does not double in shoe games, and soft 13 through 17 stay on plain hits.

Playing Against a Dealer 6, Hand by Hand
The 6 busts more often than any other upcard in the six deck tables. Every cell of the column, why every stiff stands, and why 10,10 still stands.

Playing Against a Dealer 7, Hand by Hand
The 7 is the turning point of the strategy chart: dealer busts drop to 26.2 percent and every stiff hand hits. Every cell of the column, and the arithmetic behind it.
Playing Against a Dealer Ace, Hand by Hand
The strongest upcard, cell by cell: what hits, stands and splits against a dealer ace, which cells flip with the soft 17 rule, and the arithmetic behind the surrenders.
Playing Against a Dealer 3, Hand by Hand
In the shoe game the 3 is where hard 9, soft 17 and soft 18 start doubling and 6,6 splits outright, and the last weak upcard where hard 12 hits.
Playing Against a Dealer 4, Hand by Hand
Against a dealer 4, hard 12 stands for the first time, soft 15 and soft 16 start doubling, and 3,3 becomes a plain split. Every cell, chart by chart.
Playing Against a Dealer 5, Hand by Hand
Against a dealer 5 the chart turns generous: every stiff stands, every soft hand from 13 through 17 doubles, and 4,4 finally splits when double after split is allowed.

Playing Against a Dealer 8, Hand by Hand
A dealer 8 finishes on 18 more often than on any other total, which ties your 18 instead of losing to it. The full 8 column, cell by cell, with the arithmetic shown.
Playing Against a Dealer 9, Hand by Hand
A dealer 9 finishes on 19 more often than on any other total, 35.2 percent. That spike is why soft 18 hits, 9,9 splits rather than stands, and hard 16 surrenders in shoe games.
Playing Against a Dealer 10, Hand by Hand
A dealer 10 finishes on 20 about 36.8 percent of the time. That number is a big part of both surrenders, the 9,9 stand, and why hard 11 is the only double left.
Card counting

How Card Counting Actually Works
Why high cards favor you, how the Hi-Lo running count and true count work, and the honest limits the movies leave out.
The Hi-Lo Count: The System Most Counters Learn First
The +1/0/-1 tags, the running count, true count conversion, and the drills that build table-speed accuracy.
Running Count vs True Count
Why a raw running count misleads in a shoe, and how dividing by decks remaining turns it into the number that matters.
The KO Count: Counting Without the Division
One tag of difference deletes the true count conversion. How the unbalanced Knock-Out design works and what it trades.
The Illustrious 18: The Deviations Worth Learning
Schlesinger's ranked eighteen deviations deliver most of the playing gain. The famous entries and the honest proportions.

Omega II: A Level-Two Count for the Ambitious
Two-level tags and an ace side count buy real precision, at a real price. Who should learn Carlson's system and how.

The Zen Count, Explained
Snyder's level-two system keeps the ace in the count: most of the precision, one mental track. The middle path explained.
The Ace-Five Count: The Simplest Way to Start
Track two ranks, ignore eleven, raise bets when the count is high. The gateway system and what it honestly delivers.
Index Plays: When to Break Basic Strategy
An index number is the true count at which a different play becomes correct. How to read one, which handful carry most of the value, and why an accurate count comes first.
The Fab 4: Surrender Deviations for Counters
Four surrender indices worth more than most of the Illustrious 18, what each one requires, and which direction they point.
Bet Spreads: How Counters Size Bets
A count with flat bets earns nothing. What a bet spread is, how a bet ramp maps true count to bet size, and what limits how wide you can go.
Is Card Counting Illegal?
Counting in your head is not a crime. Using a device is a different matter, and casinos can still show you the door.

How Long Does It Take to Learn Card Counting?
There is no honest hour count. There is a skill ladder, and a self-test that tells you where you are on it.
How to Practice Card Counting at Home
From counting down a single deck to true count conversion and bet spreads: the at-home ladder that turns Hi-Lo tags into a usable skill.
Beat the Dealer: How Ed Thorp Started It All
Baldwin's 1956 paper, an IBM 704, and the 1962 book that made card counting public knowledge. Where every modern count comes from.
Hi-Lo vs KO vs Omega II vs Zen: Choosing Your System
Tag values, balanced versus unbalanced, level one versus level two, and an honest answer about which system to learn first.
Estimating Decks Remaining: The Skill Behind the True Count
The true count needs a denominator nobody gives you. Reading the discard tray in half-deck steps, and how to build the eye at home.
Back Counting: Watching a Shoe Before You Sit
Tracking a shoe from outside the table and entering only when the count turns. What it buys and what it costs.
Why Counting Gets Harder as Decks Increase
One card matters less among more cards. What deck count changes about the running count, true count conversion and deck estimation.
Five Card Counting Myths That Refuse to Die
No photographic memory, not illegal, no guarantees, and no memorizing every card. What is left after the legend is cleared out.
Deck Penetration: The Number Counters Care Most About
How deep the dealer goes before shuffling decides how often a count is worth acting on.
Building Counting Speed: From Slow Deck to Fast Table
Counting speed is built in layers: instant tags, canceling pairs, a timed deck countdown, then table pace. A drill ladder with honest benchmarks.
Counting at a Full Table vs Heads Up
A full table shows more cards per round, heads up deals more rounds per hour. Which one helps a counter depends on what you are training.
Rounding the True Count: Floor, Truncate or Round
Floor, truncate and round agree on most true counts but split on awkward fractions. See where each one flips a real index play and how to pick one.
What Happens When You Lose the Count
Every counter loses the count sometimes. The trained response is a decision, not a trick: drop it, play basic strategy, restart at the shuffle.
The Red Seven Count: Counting 7s by Color
Red Seven tags red 7s as plus one and black 7s as zero, leaving each deck at plus two. The color split is a whole-number way to count 7s at partial weight.
Hi-Opt I and Hi-Opt II: Counts Built for Playing Accuracy
Two balanced counts that tag the ace zero, generally described as stronger for playing decisions than for betting. Full tag tables and the balance arithmetic.
Side Counting Aces, and Why Most Systems Skip It
An ace side count is a second tally of aces seen against aces expected, kept beside the main count to sharpen betting. Most counters skip it, for good reason.
Betting Correlation and Playing Efficiency, Explained
Betting correlation runs from .88 to .98 for every system listed, while playing efficiency spreads from .51 to .67. What each number measures and why execution matters more.
Balanced vs Unbalanced Counts: What the Difference Really Buys
Hi-Lo sums to zero over a deck, KO to plus four and Red Seven to plus two. That one line decides whether a count divides for a true count or runs straight through.
When Card Counting Is Not Worth the Effort
An honest checklist of what drains card counting of its value: continuous shufflers, shallow penetration, 6:5 payouts, an unused count, and the personal cost.

Where Card Counting Index Numbers Come From
An index number is the true count where two plays have equal expected value. The insurance break-even worked out exactly, how the rest are computed, and why lists disagree.
The Wong Halves Count: Fractions for Accuracy
A level 3 count that tags the 5 as +1.5 and the 9 as -0.5, roughly following the effect of removal table more closely than Hi-Lo, at a real mental cost.
How the Count Moves Through a Shoe
The running count's spread peaks halfway through the shoe while the true count's spread keeps growing, so the counts a counter waits for mostly arrive late.

How Card Counting Numbers Are Tested
Every counting figure is the output of a computation with assumptions. Two families of method, and the square root arithmetic that sets how many hands a number needs.
Counting a Double Deck Game vs a Shoe
Two decks instead of six: the true count spreads 1.74 times as wide at the same share dealt, deck estimation gets finer, even the chart changes. From 200,000 simulated shoes.
How Often Each True Count Comes Up
About 414 million simulated rounds show how often each Hi-Lo true count comes up: a bell near zero, a flooring convention that skews it, and a small tilt toward negative counts.
Casino rules and variations
S17 vs H17: The Small Rule With Real Cost
Whether the dealer hits soft 17 costs roughly 0.2 points of edge and flips several plays. How to spot it on the felt.

3:2 vs 6:5: The Payout That Changes Everything
A 6:5 payout costs roughly 1.4 points of edge, several times any other common rule. The math and the ten-second habit.

Double After Split: Why DAS Matters
Doubling after splits is worth roughly 0.14% and decides several borderline pairs. The whole mechanism in one read.
European Blackjack and the No Hole Card Rule
No hole card means your doubles and splits can lose to a late dealer blackjack. What ENHC costs and how to play it.
Single Deck vs Eight Decks: What Actually Changes
Fewer decks genuinely help, roughly half a percent, and the 6:5 payout usually attached takes it all back and more.

CSMs: Why the Shuffler Matters
Continuous shufflers keep the shoe permanently neutral: what CSMs and ASMs each mean for strategy and counting.
Spanish 21: Blackjack Without the Tens
Every ten removed from the deck, then a pile of compensating rules. What the trade costs and why a blackjack chart misplays it.

Vegas Strip to Macau: How Blackjack Rules Travel
Deck counts, soft 17, surrender, split limits and the no hole card rule. A tour of the common rule sets and what each does to your chart.
Early Surrender vs Late Surrender
One rule lets you fold before the dealer checks for blackjack. The other after. That timing is worth about eight times as much.
Resplitting Aces and the Small Rules That Add Up
Resplitting aces is worth about 0.08% to the player. A look at that rule and the other small print that stacks into the house edge.
What the Felt Actually Tells You Before You Sit
The payout line and the soft 17 rule are printed in front of you. A ten-second checklist for what the felt says, and what it quietly leaves out.
The Dealer Peek Rule and Why It Matters
When the dealer checks the hole card, your doubles and splits are protected. When there is no hole card, they are not.
How Many Times Can You Split? Resplit Limits Explained
Most tables let you split to four hands, and aces almost never get the same freedom. Here is why.

Early Surrender: The Rule Casinos Stopped Offering
Worth roughly 0.6 percent against late surrender's 0.08. Atlantic City offered it in the 1970s, then the industry took it back.
Tables That Only Let You Double on 9, 10 or 11
The Reno rule takes away every soft double. Here is what it costs and how strategy adapts.
The Five-Card Charlie and Other House Bonuses
The five-card Charlie sounds like a gift, which is why it rarely appears without strings attached. How Charlie rules differ from Spanish 21 bonuses and side bets.

Even Money, 6:5 and 3:2: Every Payout You Will Meet
3:2, 7:5, 6:5 and the 1:1 variants, plus even money and insurance. What each payout costs and how to read the felt before you sit.
Why the Cheap Table Often Has the Worst Rules
A lower minimum can cost more per hour when it comes with 6:5 payouts and hit soft 17.
Electronic and Video Blackjack: What Changes
Video blackjack draws cards by software and usually reshuffles every hand. Here is what that changes about counting, payouts, pace and strategy charts.
Double Exposure Blackjack: Both Dealer Cards Up
Both dealer cards face up sounds like a gift until the rest of the rule card arrives: the dealer wins ties other than blackjacks, and player blackjacks pay even money.

Free Bet Blackjack: Free Doubles and Splits, With a Catch
The house funds doubles on two-card 9, 10 and 11 and splits on most pairs. The catch: a dealer 22 pushes the hands still in play instead of busting.
Blackjack Switch: Swapping Cards and Paying for It
Swap the second cards between two hands, then pay for it with even money blackjacks and a dealer 22 push. How the trade works and what it costs.
Playing Two Hands at Once: Table Rules and Math
Two hands in the same round share one dealer, so their results are correlated at about 0.37. The variance math, plus the table rules that vary by casino.

How a Blackjack Dealer Runs a Hand, Step by Step
Every shoe starts with a shuffle, a cut and a burn card, and every round follows the same order: deal, check for blackjack, players act, dealer draws, settle.
Reading a Blackjack Rule Card: Every Abbreviation Explained
S17, DAS, RSA, ENHC, penetration, Ds, Ph: the abbreviations on a rule card or strategy chart, each defined in a sentence with what it does to the player.
Blackjack Variants Compared: Which Rule Trades Are Worth Knowing
Most blackjack variants give something visible and take something back quietly. Six variants compared, with each published figure and the rule assumptions behind it.
Where Did Blackjack Come From?
Twenty-one appears in a Cervantes story from around 1601, the name blackjack is American, and the naming bonus story is a legend. The documented record, minus the myths.
Super Fun 21: Liberal Rules, Even Money Blackjacks
Doubles on any number of cards, surrender even after doubling, a 2 to 1 diamond blackjack. Then most naturals pay even money, and the bill comes due.
Double Attack Blackjack: Raising the Bet Before Your Cards Arrive
Double Attack lets you raise your bet after seeing the dealer's upcard but before your own cards: the rules, the price in tens and payouts, and the edge figures.
Pontoon: The British Cousin of Blackjack
Pontoon pays 2 to 1 on pontoons and five-card tricks, and charges for it with no dealer upcard, ties that lose, and no standing below 15. The full trade.
OBO, OBBO and BB+1: How No Hole Card Games Settle Doubles and Splits
You split, you double, and the dealer turns over a blackjack. What you lose depends on a rule that is rarely printed: OBO, OBBO, BB+1 and the full European settlement, with costs.

Running a Home Blackjack Game Without Real Money
A kitchen table with written rules, a dealer following the real sequence and chips worth nothing is the cheapest practice table there is. Here is how to set one up.
Odds, house edge and bankroll
Blackjack House Edge: What Half a Percent Really Means
What half a percent actually measures, how rules like 6:5 move it, and why variance hides it in any single session.
Blackjack Odds and Probability, Minus the Myths
Dealer bust rates, your bust risks, the gambler's fallacy, and the three things that actually move your odds.
Bankroll Management: Units, Sessions and Survival
Units, sessions and risk of ruin: what chip discipline really controls, and what no discipline can change.

Variance: Why Perfect Play Still Loses Sessions
The per-hand swing dwarfs the edge, streaks are statistically guaranteed, and composure is the trainable part.

Risk of Ruin: The Number Serious Players Respect
The probability a bankroll runs out before the long run arrives. Why a positive edge does not make it zero, and why bet size moves it more than intuition suggests.
How Rules Stack: Using a House Edge Calculator
Rule effects add up almost cleanly, so any table can be priced from a short ledger. The numbers, worked comparisons, and the caveat that outweighs them.
Side Bets: Fun, Priced in House Edge
Perfect Pairs, 21+3 and Lucky Ladies are priced entertainment. The published house edges sit many times above the hand beside them.
Expected Value in Blackjack, Without the Math Degree
Every blackjack decision is an average, not a guess. What expected value means, why correct plays still lose, and how it kills outcome bias.
How Many Hands an Hour, and Why It Matters
Exposure is hands times edge, and occupancy swings the hands half by a factor of four. Why a crowded table costs less per hour.
How Often Are You Actually Dealt a Blackjack?
Roughly one hand in 21 is a natural. That number explains more about payout rules than it first appears.
Winning Streaks, Losing Streaks and What They Prove
Hot tables and cold shoes are what randomness looks like. What a streak can honestly tell you, and what it never can.
How Often Does a Blackjack Hand Push?
About one hand in twelve ties, almost all on 20. Why win rates look grim, and why a push is not a wasted hand.
Why Session Length Changes What You Feel, Not What You Face
The house edge per hand never changes with session length, but the spread of results does. Why short sessions feel random and long stretches reveal the edge.

How Casinos Rate Play: Theoretical Loss Explained
Casinos rate play by expected loss, not results. Here is the theoretical loss formula in plain terms.
Your Chance of Busting on Every Hard Total
The chance of busting with one hit on every hard total, why each point adds about 7.7 percentage points, and why 16 against a 10 still gets hit.

The Martingale in Blackjack: Why Doubling After Losses Fails
Each win repays the losing streak plus one unit, until a doubled bet runs into the table limit. The Martingale trades many small wins for one rare collapse.

Blackjack's House Edge Next to Roulette, Craps and Slots
Blackjack's roughly half percent edge beside roulette, craps, baccarat, video poker and slots, plus the fine print behind every number in the table.

Effect of Removal: What One Card Is Worth
Removing one 5 from a six-deck shoe helps the player more than any other single card, plus 0.141 percent. The table behind that fact is where counting tags come from.
What the Dealer Actually Ends Up With, Upcard by Upcard
Beyond bust rates: how often the dealer finishes on 17 through 21 for every upcard, why a 7 up peaks at 17, and what hitting soft 17 moves.
Your Chance of Being Ahead After 100, 1,000 and 10,000 Hands
After 100 hands a basic strategy player is ahead about 48 percent of the time; after 10,000, about 33 percent. The expected loss grows faster than the spread.
How Often Each Blackjack Starting Hand Comes Up
Hard 20 is the most common two-card total and stiffs are the largest group at 38.51 percent. Full six deck frequency tables, with the arithmetic shown.
Paroli, D'Alembert and Other Progressions: Why None Beat the House Edge
D'Alembert, Labouchere, Fibonacci, Oscar's Grind and the Paroli explained, with a worked Labouchere run, and why none changes the expected loss per unit wagered.

Does Deck Penetration Matter If You Do Not Count?
For a basic strategy player, penetration changes almost nothing per hand, and the cut card itself costs a few hundredths of a percent in a shoe. Pace is what changes the hourly cost.
How Many Cards a Blackjack Hand Uses
Our simulation of 2.4 million rounds measured it: 2.72 cards per player hand at any table size, and a shoe that lasts 43 rounds alone but 11 at a full table.
How the Player's Edge Moves With the True Count
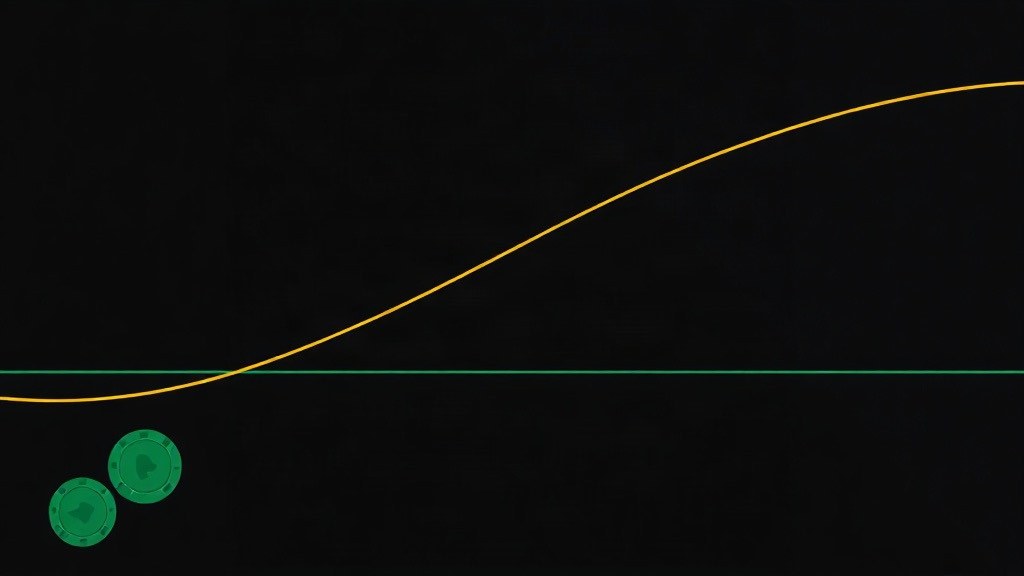
Our 414 million round simulation shows a flat bettor's average result at every Hi-Lo true count: it climbs about half a percent per count and turns positive at +1.
Training and practice
The Best Blackjack Trainer App for iPhone: What Actually Matters
A practical checklist for choosing a trainer that actually teaches: feedback with reasons, rule-aware charts, real counting drills, honest stats.

How to Practice Blackjack Without Risking a Dollar
A practice ladder that builds real skill: rules, drills with feedback, weak-spot quizzes, then simulator discipline.

How to Memorize a Basic Strategy Chart
Nobody memorizes 270 cells. Compress the chart into patterns, drill the exceptions, and let your errors write the plan.
Blackjack Drills That Actually Build Skill
Random dealing rehearses what you know. Weakness drills, speed drills and daily challenges are what move the needle.

What a Blackjack Simulator Teaches That a Table Cannot
Volume, honest variance, and an adherence grade no casino gives you: what simulator sessions are actually for.
Test Your Blackjack Strategy: What a Good Quiz Measures
An overall score of 95 percent can still hide a systematic hole. What a strategy quiz should measure, per hand type and per dealer upcard, and what a solid result looks like.
Trainer App vs Strategy Book: How People Actually Learn
Books hold the reasoning and the canon; drills convert it into recall. What each is better at, and the loop that uses both.

A Ten-Minute Daily Blackjack Practice Routine
Ten focused minutes a day beats a monthly marathon. A four-block routine: warm up, weak spots, one new piece, mixed check.

Learn Blackjack from Zero: A Beginner's Path
The order that actually works: rules first, then the strategy chart, then drills until the answers are automatic. Counting comes much later.

Why an Offline, On-Device Blackjack Trainer Matters
Practice tools that need a network fail exactly where you need them. What on-device really means, for privacy and for the drill loop.

Practicing Blackjack Away From a Screen
A real deck, a stack of index cards and ten minutes: how to drill blackjack strategy and the deck countdown with no app in sight.
How Fast Should You Make a Blackjack Decision?
A decision you cannot make in two seconds is not automatic yet. Realistic pacing targets, and how to build speed without trading away accuracy.
What Your Blackjack Accuracy Percentage Really Means
A 94% score sounds excellent and often is not. How sample size, hand mix and heat maps decide whether your practice number means anything.
Five Ways People Practice Blackjack Wrong
Outcome bias, uniform drilling, rule drift, premature speed, and practice that measures nothing: the five failure modes and their fixes.
Coming Back to Blackjack After a Long Break
Skills fade in a predictable order after a layoff. Here is what goes first, what survives, and how to rebuild it.
When Practice Stops Working: Breaking a Blackjack Plateau
Accuracy climbs fast and then stalls. Why practice plateaus happen, and how targeting, novelty and the right measurement break through one.
Teaching Someone Else Basic Strategy
Start with the dealer's fixed script, then five sentences, then hand off to drills. The order that produces a mental model instead of a memorized list.
A Four-Week Blackjack Practice Schedule
A week-by-week plan that takes a beginner from nothing to reliable basic strategy in four weeks of short daily sessions.
How to Memorize Blackjack Index Numbers
Index numbers are memorized as a small set, not a chart. Learn insurance first, group the rest by count value, and drill recall in both directions.
Counting and Playing Basic Strategy at the Same Time
How to layer counting on top of basic strategy in stages so neither skill breaks under pressure.
Practicing With Noise, Chatter and a Fast Dealer
Quiet practice hides a gap. Add speed, noise, conversation and interruptions one rung at a time, and measure accuracy against your quiet baseline.

Keeping a Blackjack Practice Log That Actually Helps
A month of chip totals measures luck, not skill. A useful log records process instead: drill type, context, and a named list of the hands you keep missing.
Drilling Pair Splits When Pairs Rarely Show Up
Pairs show up too rarely in mixed practice to build recall. Forced frequency drilling, one rank at a time, fixes the pair block.
Spotting Soft Hands Instantly: A Recognition Drill
A hand is soft when it holds an ace that can count as 11 without passing 21. The drill is about applying that test fast, before the chart.
Blackjack Hand Signals and Why Dealers Require Them
Tap to hit, wave to stand, one finger to double, a V to split. Both signal sets, why casinos require them, and how to drill them at home.
Practicing for the Rules You Will Actually Face
Most learners drill one generic chart, then sit at a table with different rules. Pick the rule set first, drill that chart cold, and track the cells that move.
Drilling Surrender Decisions That Rarely Come Up
Surrender hands arrive too rarely for mixed practice to teach them, and the fallbacks differ: most revert to a hit, but 17 against an ace reverts to a stand.
Practicing Blackjack With a Partner
Two learners drilling each other get a pace they do not control, an answer key outside their own head, and hesitation said out loud. Four formats and the limits.
Building Blackjack Flashcards That Actually Work
Most homemade flashcard decks fail the same four ways. Build around the exceptions, label the rule set, and let a three box review system sort the deck.
Blocked vs Mixed Drills: Why the Order of Practice Hands Matters
A block of soft hands tells you the hand is soft for free. Mixed practice makes you earn that fact every hand, and that is the step a real table demands.
Knowing When to Stop a Blackjack Practice Session
Misses clustering after a clean stretch, slower decisions, a repeated miss right after the correction: the signs a session has stopped paying, and where to stop.
What to Do in the Ten Seconds After a Wrong Answer
The moment after a miss either fixes the error or files it unread. A five step protocol for that pause, and the three reactions that feel productive and are not.
How Do You Know the Chart Is Finally Learned?
One good session is not evidence. A checklist for whether the basic strategy chart is actually learned, from accuracy that holds to the rare rows and the rule set you never named.
Drilling the Dealer Upcard Until It Reads Itself
Fluent players do not see a 6, they see weak. Two families, the seam between the 6 and the 7 where 15 of 28 chart rows flip, and four drills that train the read.
Teaching Card Counting to Someone Else
Teaching counting is a question of order: basic strategy automatic, then Hi-Lo tags, deck countdowns, speed, true count conversion, counting while playing, index plays last.
Put it into practice
Drill every decision from these guides with instant feedback, free on iPhone and Android.